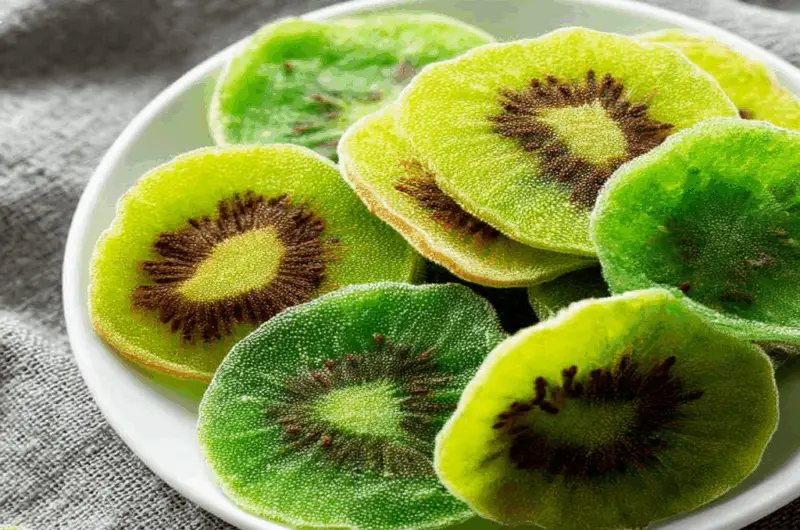
Imagine biting into a sweet, chewy piece of sunshine that bursts with flavor and brings a smile to your face. That’s exactly what you’ll experience with this Dried Kiwi Slices Recipe. The tangy sweetness mingles perfectly with its vibrant green color, making it feel like you’re munching on little jewels from nature itself. sweet and savory BBQ chicken Perfect for snacking or adding to your favorite trail mix, these dried kiwi slices will have you daydreaming about tropical beaches and sunny afternoons.
Now, let me take you back to my childhood, where my love for kiwi began. Picture this: a family picnic under a sprawling oak tree, the sun shining brightly, and my mom unpacking her famous fruit salad. Among the strawberries and bananas were these delightful slices of kiwi, their bright color poking out like tiny green flags waving in delight. Fast forward to today, and I can’t help but recreate that moment every time I make dried kiwi slices. They’re perfect for any occasion—be it movie night or a healthy snack for the kids after school—and they will have you grinning from ear to ear.
Why You'll Love This Recipe
- This Dried Kiwi Slices Recipe is incredibly easy to prepare—just slice, dry, and enjoy!
- The flavor profile offers a delightful balance of tangy sweetness that everyone loves.
- Visually stunning with their vibrant green hue, they make an eye-catching addition to any snack platter.
- Plus, they are versatile; toss them into salads or granola for an extra kick!
Ingredients for Dried Kiwi Slices Recipe
Here’s what you’ll need to make this delicious dish:
- Fresh Kiwis: Choose ripe kiwis that yield slightly when pressed for maximum sweetness.
- Lemon Juice: A splash of lemon juice prevents browning and enhances the flavor.
How to Make Dried Kiwi Slices Recipe
Follow these simple steps to prepare this delicious dish:
Step 1: Prepare Your Kiwis
Start by washing your fresh kiwis under cool running water. Make sure they’re squeaky clean because we don’t want any dirt ruining our tropical paradise.
Step 2: Slice Them Up
Using a sharp knife, carefully slice each kiwi into thin rounds about ¼ inch thick. If you want some variety (and who doesn’t?), try slicing some into stars or hearts—it’s all about presentation!
Step 3: Add Lemon Juice
In a mixing bowl, toss your kiwi slices with a tablespoon of lemon juice. This not only keeps them looking fresh but also adds a zingy flavor that balances their natural sweetness.
Step 4: Arrange on Dehydrator Trays
Lay the kiwi slices out in a single layer on your dehydrator trays (or baking sheets if using the oven). Make sure they don’t overlap unless you’re trying for an abstract art project!
Step 5: Dry Them Out
If using a dehydrator, set it to 135°F (57°C) and allow your kiwis to dry for about 6-8 hours until they are chewier than a pair of well-worn sneakers (but way more delicious). For oven drying, preheat it to 200°F (93°C) and bake for about 4-6 hours.
Step 6: Cool and Store
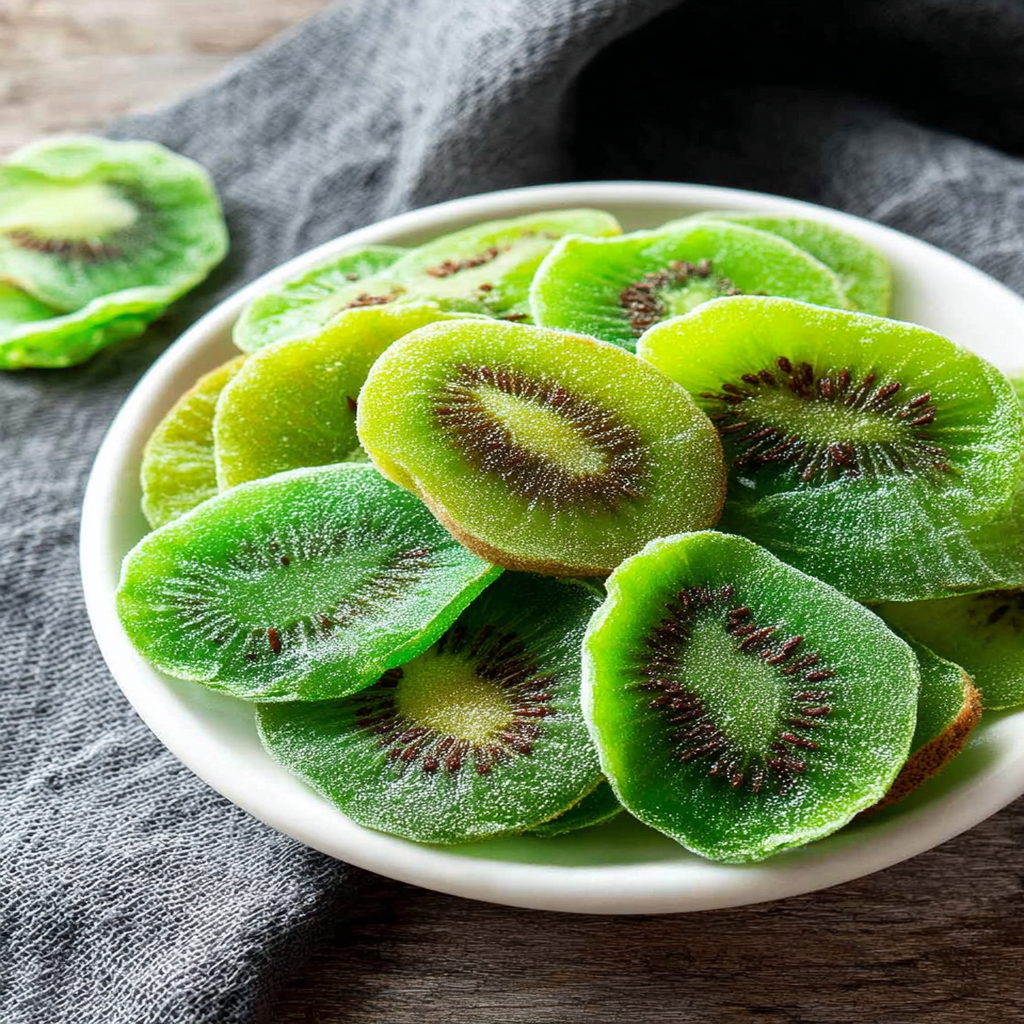
Once dried, let your kiwi slices cool completely before transferring them to an airtight container. And voilà—you’ve got yourself some homemade dried kiwi chips!
Transfer those little beauties onto plates and serve them as snacks or store them away for later indulgence—if you can resist devouring them right away!
You Must Know
- Dried Kiwi Slices Recipe is not just about snacking; it’s a delightful way to enjoy the sweet tang of kiwi anytime.
- Plus, they’re packed with nutrients and can be easily stored.
- Perfect for road trips or a healthy snack at home!
Perfecting the Cooking Process
Start by washing and peeling the kiwis. Slice them into thin rounds for even drying. Preheat your dehydrator or oven, then place the slices in a single layer. This ensures they dry evenly and crisply.
Add Your Touch
Feel free to sprinkle some cinnamon or a dash of sugar on the kiwi slices before drying for an extra flavor kick. You can also mix in other fruits like strawberries or bananas to create a fruity medley!
Storing & Reheating
Once dried, store your kiwi slices in an airtight container in a cool, dark place for up to six months. No reheating necessary—just grab and enjoy as is!
Chef's Helpful Tips
- Ensure your kiwi slices are uniform in thickness to guarantee even drying.
- Experiment with different fruits for unique flavors.
- Always check for crispness before storing, as any moisture can lead to spoilage.
I remember the first time I made dried kiwi slices; my friends devoured them within minutes! Their astonishment at how deliciously crunchy they were was priceless, and now they’re my go-to snack for gatherings. delicious vegan coconut curry.
FAQs:
What are the benefits of making Dried Kiwi Slices at home?
Making dried kiwi slices at home offers several benefits, including control over the ingredients and the absence of preservatives. You can select ripe kiwis for optimal flavor and sweetness, ensuring a healthier snack option. Additionally, homemade dried kiwi slices can be customized to suit your taste preferences, whether you prefer them sweeter or tangier. This recipe also allows you to save money compared to store-bought options, making it a budget-friendly choice for healthy snacking.
How long do Dried Kiwi Slices last?
Dried kiwi slices can last for several months when stored properly. Keep them in an airtight container in a cool, dark place to maintain their quality. If you refrigerate them, they can last up to a year. However, it’s best to consume them within three to six months for optimal flavor and texture. Always check for any signs of spoilage before consuming; if they smell off or have an unusual texture, it’s best to discard them.
Can I use a dehydrator for my Dried Kiwi Slices Recipe?
Yes, using a dehydrator is an excellent method for making dried kiwi slices. A dehydrator provides consistent heat and airflow, which helps achieve perfectly dried fruit without the risk of cooking it. Simply slice your kiwis evenly and arrange them on the dehydrator trays. Set the temperature according to your device’s instructions and allow the drying process to take place until the slices are fully dehydrated. This method often results in better texture compared to using an oven.
What other fruits can I dry alongside my Dried Kiwi Slices?
You can dry various fruits alongside your dried kiwi slices for a delicious mix. Some popular options include apples, bananas, mangoes, and strawberries. These fruits complement each other well and offer an assortment of flavors and textures in one snack mix. Ensure that all fruits are sliced evenly so they dehydrate uniformly. Experimenting with different combinations can create unique snacks that satisfy your cravings while providing healthy nutrients.
Conclusion for Dried Kiwi Slices Recipe:
In summary, creating your own dried kiwi slices is both rewarding and simple. The process allows you to control ingredients while enjoying a healthy snack option free from preservatives. Store these delicious treats properly to extend their shelf life up to several months or more when needed. Feel free to experiment with other fruits during dehydration for added variety in flavors and textures! Enjoy this nutritious snack guilt-free anytime!
Dried Kiwi Slices

Dried Kiwi Slices are a vibrant, chewy snack that brings the taste of tropical sunshine to your palate. These delightful treats are not only easy to make but also serve as a nutritious alternative to store-bought snacks. With just ripe kiwis and a splash of lemon juice, you can create a flavorful addition to your trail mix, salads, or enjoy them straight from the jar. Perfect for any occasion, these homemade dried kiwi slices guarantee a smile with every bite.
- Prep Time: 15 minutes
- Cook Time: 6 hours
- Total Time: 6 hours 15 minutes
- Yield: Approximately 4 servings 1x
- Category: Snack
- Method: Dehydrating
- Cuisine: American
Ingredients
- 4 ripe fresh kiwis (about 2 cups sliced)
- 1 tablespoon lemon juice
Instructions
- Wash the kiwis thoroughly under cool water to remove any dirt.
- Slice each kiwi into thin rounds, about ¼ inch thick.
- Toss the slices in a bowl with lemon juice to prevent browning and enhance flavor.
- Arrange the kiwi slices in a single layer on dehydrator trays or baking sheets.
- Dehydrate at 135°F (57°C) for 6-8 hours or bake at 200°F (93°C) for 4-6 hours until they reach your desired chewiness.
- Allow to cool completely before storing in an airtight container.
Nutrition
- Serving Size: 1 serving
- Calories: 85
- Sugar: 17g
- Sodium: 1mg
- Fat: 0.3g
- Saturated Fat: 0g
- Unsaturated Fat: 0g
- Trans Fat: 0g
- Carbohydrates: 22g
- Fiber: 2g
- Protein: 1g
- Cholesterol: 0mg