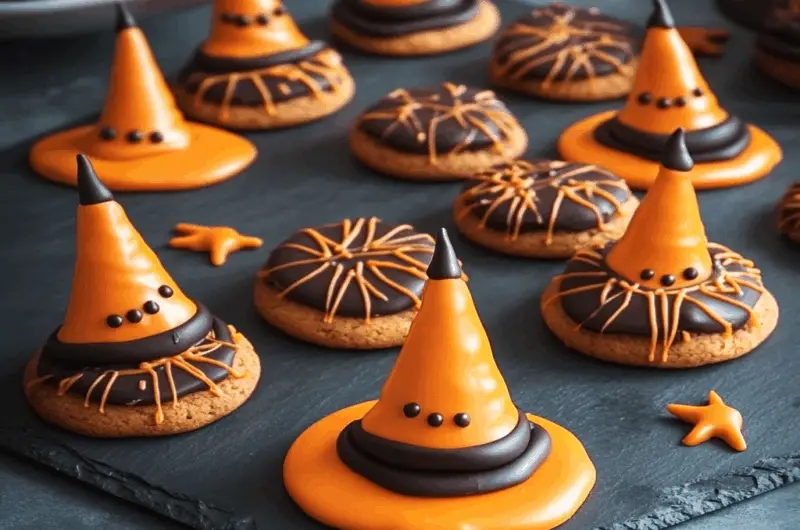
Witch Hat Cookies are more than just a seasonal delight; they are a magical experience. Imagine biting into a crisp, chocolatey cone adorned with vibrant frosting and sprinkles that scream Halloween fun. beach-themed cupcakes for events The flavors dance on your palate, combining rich chocolate with a hint of sweetness and a delightful crunch.
These cookies evoke memories of childhood Halloweens, running from house to house, gathering treats while wearing the most outrageous costumes imaginable. You’ll want to whip these up for spooky gatherings, classroom parties, or simply to indulge in some sweet nostalgia. Trust me; your taste buds will thank you for this enchanting flavor adventure.
Why You'll Love This Recipe
- Witch Hat Cookies are incredibly easy to prepare, making them perfect for last-minute treats.
- The rich chocolate flavor pairs beautifully with colorful frosting and sprinkles, creating a visual feast.
- Their unique shape adds playful charm to any Halloween celebration.
- These cookies are versatile enough to be customized with various toppings based on your favorite flavors.
Ingredients for Witch Hat Cookies
Here’s what you’ll need to make this delicious dish:
- Chocolate Sugar Cookie Dough: You can either make this from scratch or grab pre-made dough from the store for convenience.
- Chocolate Fudge Frosting: Choose a creamy frosting for easy spreading and an extra chocolate kick.
- Ice Cream Cones: Opt for pointed cones to get that classic witch hat shape; sugar cones work best.
- Sprinkles: Use colorful varieties that scream Halloween—think orange, purple, and black
How to Make Witch Hat Cookies
Follow these simple steps to prepare this delicious dish:
Step 1: Preheat the Oven
Begin by preheating your oven to 350°F (175°C). Line a baking sheet with parchment paper so those cookies don’t stick like they’ve got super glue on them.
Step 2: Shape the Cookies
Roll out your chocolate sugar cookie dough on a floured surface until it’s about half an inch thick. Use a round cookie cutter (or even the rim of a glass) to cut out circles. Then use a smaller cutter or knife to cut out triangles from each circle’s edge—these will be the base of your witch hats!
Step 3: Bake the Cookies
Place your cookie shapes on the prepared baking sheet and bake them in the preheated oven for about 10-12 minutes until they’re firm but still soft in the center. Remove them from the oven and let them cool completely on wire racks.
Step 4: Frost Those Hats
Once your cookies are cool, grab that delicious chocolate fudge frosting and spread it generously over each cookie’s top surface. Make sure it’s thick enough so that it sticks well to the cone!
Step 5: Assemble Your Witch Hats
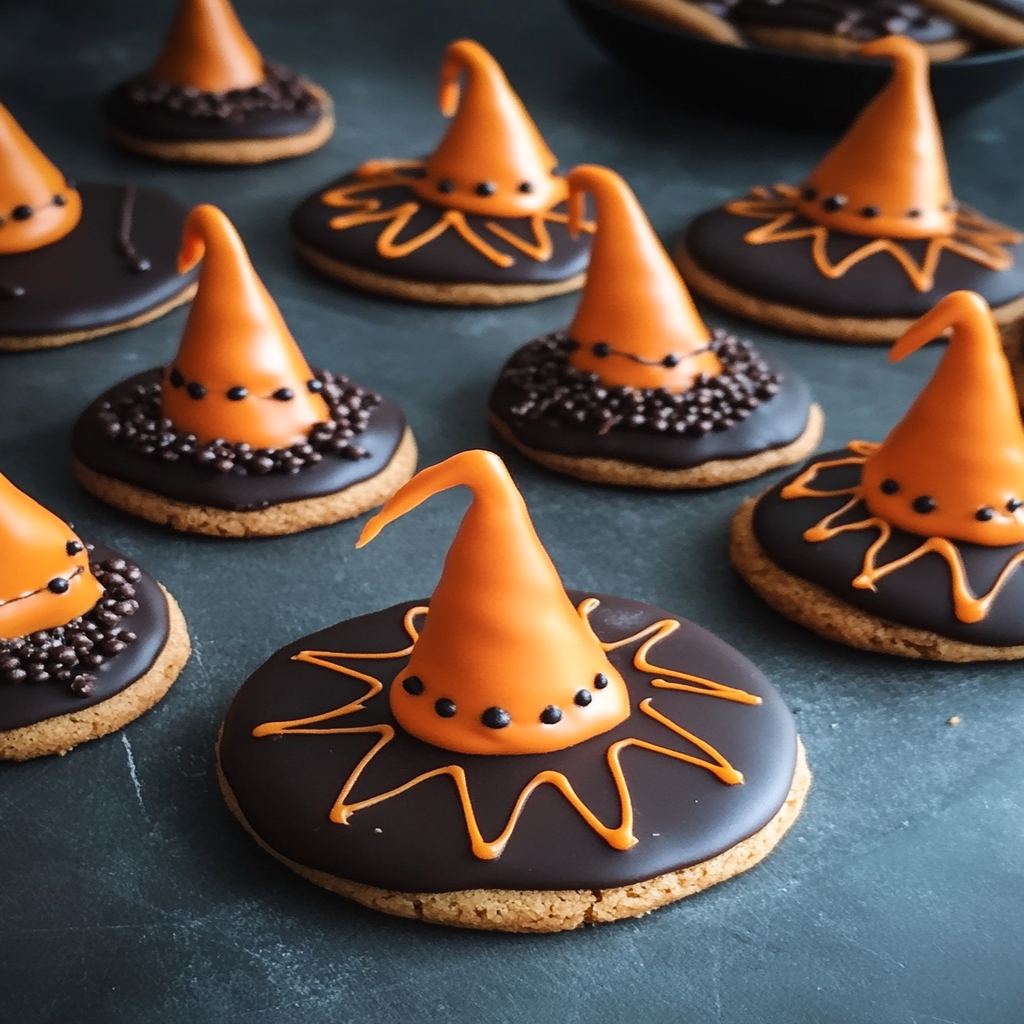
Now comes the fun part! Take an ice cream cone and gently press it into the frosting-covered cookie base, making sure it stands upright like a proud witch hat.
Step 6: Add Sprinkles
To finish off your delightful creations, sprinkle those colorful toppings all over! Kids (and adults) will love helping with this step; just be prepared for some sprinkles flying everywhere—it’s all part of the magic!
Transfer these enchanting Witch Hat Cookies onto a festive platter and watch as everyone eagerly grabs one—just try not to eat them all yourself!
You Must Know
- Witch Hat Cookies are not just a treat; they’re a whimsical addition to any Halloween gathering.
- With their enchanting design and delightful taste, these cookies will cast a spell on your guests.
- Easy to make and incredibly fun, they’ll have everyone begging for more!
Perfecting the Cooking Process
Begin by preparing your cookie dough first. While it’s chilling, melt the chocolate for dipping. Once the dough is ready, bake your cookies and allow them to cool before decorating. This sequence ensures everything flows smoothly and results in perfectly crafted Witch Hat Cookies.
Add Your Touch
Feel free to swap out chocolate for vibrant colored icing or use different types of candies to decorate the hats. You can even experiment with flavor extracts like peppermint or almond to add a personal twist that reflects your taste.
Storing & Reheating
Store your Witch Hat Cookies in an airtight container at room temperature for up to a week. If you need to reheat them, pop them in the microwave for just a few seconds—this keeps them soft and delicious without losing their magical charm.
Chef's Helpful Tips
- To achieve the perfect shape, chill your dough thoroughly before cutting it out into triangles.
- Remember to let the cookies cool completely before dipping them in chocolate, ensuring the layers stick together nicely.
- For extra pizzazz, roll the edges of each cookie in sprinkles before they set!
Sharing these Witch Hat Cookies with my friends during our annual Halloween bash was unforgettable! Watching their faces light up as they bit into those spooky treats made all the baking worth it.
FAQs:
What are Witch Hat Cookies?
Witch Hat Cookies are a fun and festive treat perfect for Halloween. These cookies are typically made using chocolate cookies or cones shaped like witches’ hats. They often feature a chocolate base topped with a candy corn or similar sweet to create the iconic witch hat look. creative dessert options like choux This delicious dessert is not only visually appealing but also easy to make with kids, making it a great activity for family gatherings during the spooky season.
How do I decorate Witch Hat Cookies?
To decorate Witch Hat Cookies, start with your chosen cookie base, whether it’s a chocolate cookie or sugar cookie. Then, use melted chocolate or frosting to attach a candy corn on top as the hat’s tip. You can add extra details, such as icing to create a band around the hat or sprinkles for added color. themed sugar cookies to complement The decoration process allows for creativity, so feel free to experiment with different colors and designs to make your cookies unique.
Can I make Witch Hat Cookies ahead of time?
Yes, you can make Witch Hat Cookies ahead of time! In fact, they can be prepared a day in advance and stored in an airtight container at room temperature. However, if you plan on adding the candy corn decorations, it’s best to do this closer to serving time. This will help maintain the freshness of the cookies and prevent any melting or mess from the candy corn.
Are there variations of Witch Hat Cookies?
Absolutely! There are many variations of Witch Hat Cookies you can try. You can use different types of cookies as the base, such as peanut butter or gingerbread cookies. For a twist, consider using different candies instead of candy corn for the hat tip. Additionally, you can experiment with various frostings or toppings to customize flavors and visuals that fit your Halloween theme perfectly.
Conclusion for Witch Hat Cookies:
Witch Hat Cookies offer a delightful way to celebrate Halloween with their charming appearance and delicious flavors. These treats are easy to make and can be customized based on personal preferences or dietary needs. Whether you’re decorating them with kids or serving them at a party, these cookies will surely impress guests and bring festive cheer. Enjoy creating your own batch of Witch Hat Cookies this Halloween season!
Witch Hat Cookies

Witch Hat Cookies are the perfect festive treat for Halloween, combining rich chocolate flavor and whimsical design. These delightful cookies feature a chocolate base shaped like witch hats, topped with creamy frosting and colorful sprinkles. Easy to make and fun to decorate, they are sure to become a favorite at any Halloween gathering. Whether you’re celebrating with friends or sharing with family, these enchanting cookies will add a magical touch to your festivities.
- Prep Time: 20 minutes
- Cook Time: 12 minutes
- Total Time: 32 minutes
- Yield: About 12 cookies 1x
- Category: Dessert
- Method: Baking
- Cuisine: American
Ingredients
- 1 cup chocolate sugar cookie dough
- 1 cup chocolate fudge frosting
- 12 pointed ice cream cones (sugar cones preferred)
- 1/2 cup assorted Halloween sprinkles
Instructions
- Preheat the oven to 350°F (175°C) and line a baking sheet with parchment paper.
- Roll out the cookie dough on a floured surface to about 1/2 inch thick. Cut circles using a round cutter, then cut triangles from each circle's edge for the witch hat base.
- Bake cookies for 10-12 minutes until firm but soft in the center. Cool completely on wire racks.
- Spread chocolate frosting over each cookie, ensuring it's thick enough to hold the ice cream cone.
- Press an ice cream cone into the frosting-covered cookie base to create the witch hat shape.
- Decorate with Halloween sprinkles, allowing everyone to join in on the fun.
Nutrition
- Serving Size: 1 cookie (45g)
- Calories: 180
- Sugar: 12g
- Sodium: 120mg
- Fat: 8g
- Saturated Fat: 4g
- Unsaturated Fat: 4g
- Trans Fat: 0g
- Carbohydrates: 26g
- Fiber: 1g
- Protein: 2g
- Cholesterol: 10mg