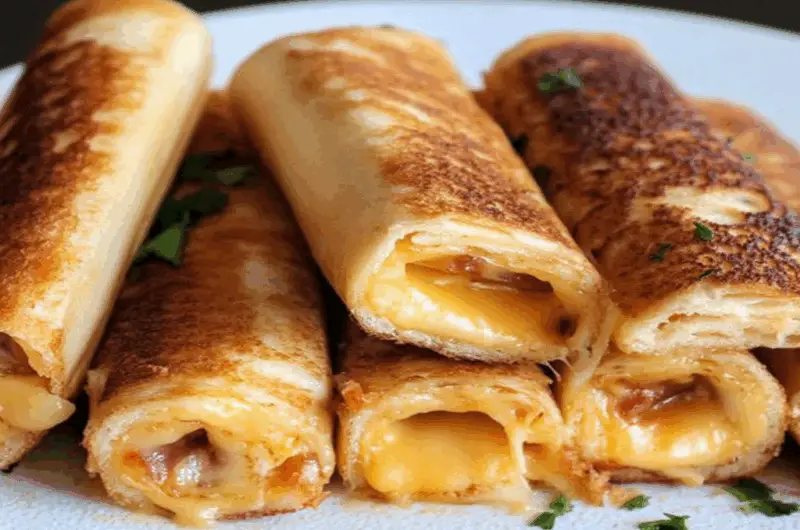
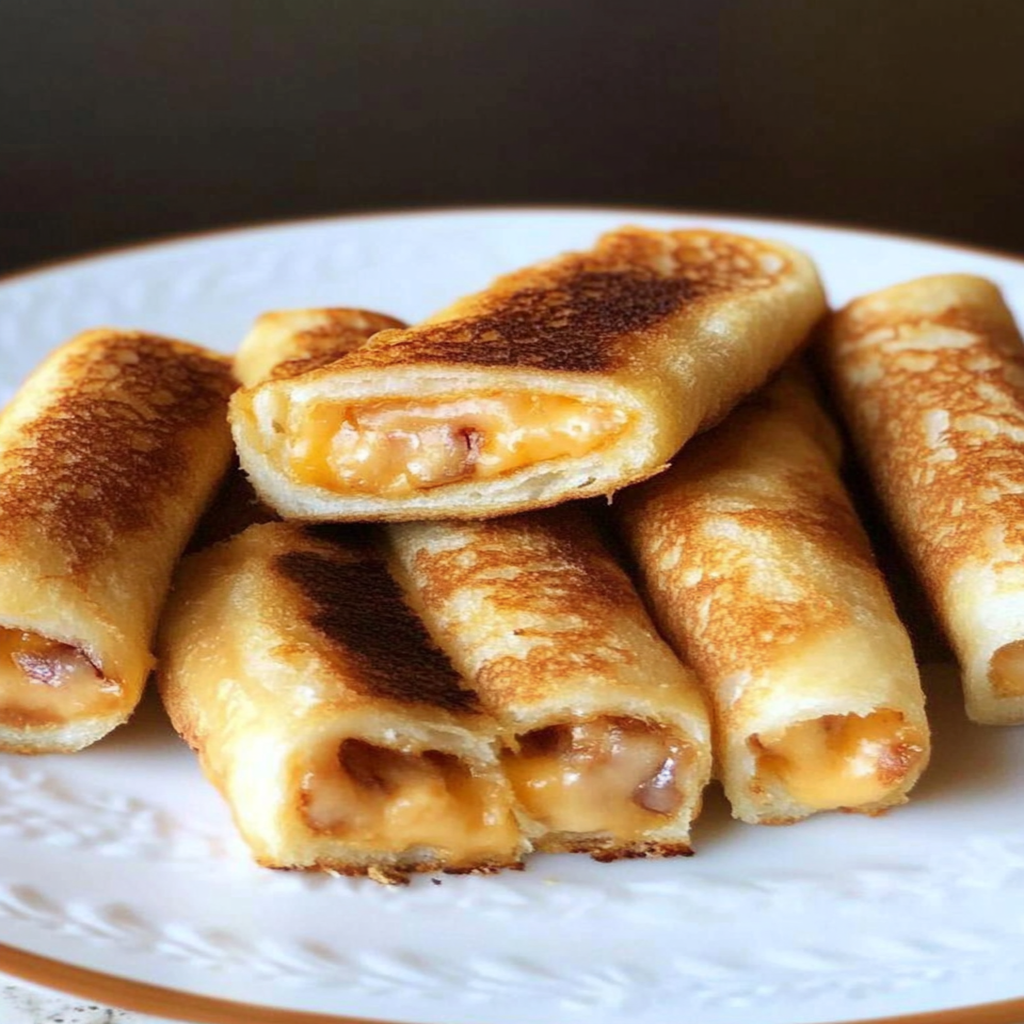
Grilled-cheese-roll-ups are the ultimate comfort food that transports you back to your childhood, where every bite is a warm hug from the inside. Imagine crispy, golden bread enveloping gooey, melted cheese that stretches and pulls with each delicious bite – it’s like a cheesy dream come true. The aroma wafts through your kitchen, beckoning everyone to gather around and indulge in this fun twist on a classic favorite.
Now, let me take you on a journey of nostalgia: picture yourself after school, racing home to find your mom in the kitchen, crafting culinary magic. As you entered, the smell of grilled cheese made your heart race with excitement. Today, we’re bringing that joy back with grilled-cheese-roll-ups! These little bundles of joy are perfect for parties, movie nights, or when you simply need to treat yourself after a long day.
Why You'll Love This Recipe
- These grilled-cheese-roll-ups are incredibly easy to make, so even novice cooks can impress their friends.
- The flavor profile is rich and satisfying, with gooey cheese that will have you reaching for seconds.
- Visually captivating with their golden-brown crusts, they’re sure to be a hit at any gathering.
- Plus, they’re versatile enough to customize with your favorite ingredients!
Ingredients for grilled-cheese-roll-ups
Here’s what you’ll need to make this delicious dish:
- Bread: Choose soft white or whole wheat bread for the best texture; it should be fresh for rolling.
- Cheddar Cheese: Sharp cheddar melts beautifully and offers a rich flavor; feel free to mix in other cheeses like mozzarella for extra gooeyness.
- Butter: Use unsalted butter for frying; it adds richness and helps achieve that perfect golden color.
- Garlic Powder: A sprinkle adds an extra layer of flavor that complements the cheese wonderfully.
How to Make grilled-cheese-roll-ups
Follow these simple steps to prepare this delicious dish:
Step 1: Prepare the Bread
Start by removing the crusts from your slices of bread. This is not just about aesthetics; it allows for easier rolling without cracking.
Step 2: Flatten It Out
Using a rolling pin or your trusty wine bottle (you know you have one), flatten each slice of bread until it’s about half its original thickness. This will help them roll up nicely!
Step 3: Add the Cheese
Sprinkle a generous amount of shredded cheddar cheese onto each slice of flattened bread. Want some flair? Mix in different types of cheese or add cooked bacon bits for an unexpected twist.
Step 4: Roll It Up
Carefully roll each slice from one end to the other tightly. Think of it as making tiny burritos—deliciously cheesy burritos!
Step 5: Butter Up
Melt some butter in a skillet over medium heat. Once melted, place your roll-ups seam-side down into the pan. Fry them until they’re golden brown and crispy on all sides; this usually takes about three minutes per side.
Step 6: Serve & Enjoy
Remove them from the skillet and let them cool slightly before slicing them into bite-sized pieces. Serve with marinara sauce or your favorite dipping sauce for an extra flavor kick.
There you have it! Grilled-cheese-roll-ups that will leave everyone asking for seconds—and maybe even thirds! Enjoy reliving those nostalgic moments while indulging in this delightful treat that’s as much fun to make as it is to eat!
You Must Know
- These grilled cheese roll-ups are not just a snack; they’re a delightful twist on a classic favorite.
- With gooey cheese and crispy edges, they make for an irresistible treat—perfect for kids and adults alike.
- Easy to whip up, they add fun to any meal!
Perfecting the Cooking Process
Start by flattening the bread slices with a rolling pin for even cooking. Then, layer cheese and your choice of fillings before rolling tightly. Heat butter in a skillet and cook until golden brown on all sides, ensuring that the cheese melts perfectly.
Add Your Touch
Feel free to swap out cheeses for your favorites—think pepper jack for a spicy kick or fontina for extra creaminess. You can also add cooked bacon, fresh herbs, or even jalapeños to elevate your grilled cheese roll-ups to gourmet status.
Storing & Reheating
To store leftover grilled cheese roll-ups, place them in an airtight container in the fridge for up to three days. Reheat in a skillet over medium heat until warm and crispy again—nobody likes soggy bread!
Chef's Helpful Tips
- For the perfect grilled cheese roll-ups, use fresh bread that’s soft but sturdy enough to hold fillings without tearing.
- Be patient while cooking; golden brown takes time!
- Lastly, don’t skip the butter—it adds flavor and helps achieve that perfect crunch.
FAQs
What are grilled-cheese-roll-ups?
Grilled-cheese-roll-ups are a fun twist on traditional grilled cheese sandwiches. Instead of the standard slices of bread, this recipe uses rolled-up bread filled with cheese and then grilled until golden brown. The result is a crispy exterior with a gooey, melty cheese center. These roll-ups are perfect for kids and adults alike, making them an excellent party snack or quick meal option.
How do you make grilled-cheese-roll-ups?
To make grilled-cheese-roll-ups, start by flattening slices of bread using a rolling pin. Spread your favorite cheese in the center, then roll the bread tightly around the cheese. Dip the roll in egg and breadcrumbs before grilling it in a pan until crisp and golden. Serve with ketchup or marinara sauce for dipping. This method produces deliciously cheesy bites that everyone will love!
Can I use different types of cheese for grilled-cheese-roll-ups?
Absolutely! You can use any type of cheese you like for grilled-cheese-roll-ups. Popular choices include cheddar, mozzarella, pepper jack, or even a blend of different cheeses for added flavor. Feel free to experiment with flavored cheeses or add ingredients like ham or spinach inside the rolls to create unique variations.
How do I store leftover grilled-cheese-roll-ups?
To store leftover grilled-cheese-roll-ups, place them in an airtight container once they cool down to room temperature. They can be stored in the refrigerator for up to three days. For best results, reheat them in an oven or toaster oven to retain their crispy texture. Avoid using the microwave, as it may make them soggy.
Conclusion for grilled-cheese-roll-ups
Grilled-cheese-roll-ups combine simplicity with deliciousness, making them a fantastic choice for quick meals or snacks. Their versatility allows you to customize fillings based on your preferences, whether savory or cheesy delights. savory cottage cheese flatbread With easy preparation and minimal cooking time, these roll-ups become a favorite among kids and adults alike. So gather your ingredients and enjoy this delightful twist on a classic comfort food!
Grilled Cheese Roll-Ups
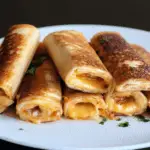
Grilled-cheese-roll-ups are a delightful twist on the classic grilled cheese sandwich, offering crispy, golden bites filled with gooey melted cheese. Perfect for parties, movie nights, or a comforting snack, these easy-to-make roll-ups will transport you back to childhood with every delicious bite. Simple ingredients and quick preparation make them a hit with both kids and adults alike!
- Prep Time: 15 minutes
- Cook Time: 12 minutes
- Total Time: 27 minutes
- Yield: Serves 4 (2 roll-ups per serving) 1x
- Category: Snack
- Method: Frying
- Cuisine: American
Ingredients
- 8 slices soft white or whole wheat bread
- 2 cups shredded sharp cheddar cheese
- 4 tbsp unsalted butter
- 1 tsp garlic powder
Instructions
- Remove the crusts from the bread slices for easier rolling.
- Flatten each slice of bread with a rolling pin until half its original thickness.
- Sprinkle a generous amount of cheddar cheese on each slice; add optional ingredients if desired.
- Roll each slice tightly from one end to the other.
- In a skillet over medium heat, melt butter and place roll-ups seam-side down in the pan. Cook for about 3 minutes per side until golden brown and crispy.
- Allow to cool slightly, then slice into bite-sized pieces and serve with your favorite dipping sauce.
Nutrition
- Serving Size: 2 roll-ups (70g)
- Calories: 310
- Sugar: 1g
- Sodium: 570mg
- Fat: 22g
- Saturated Fat: 13g
- Unsaturated Fat: 9g
- Trans Fat: 0g
- Carbohydrates: 25g
- Fiber: 1g
- Protein: 10g
- Cholesterol: 40mg