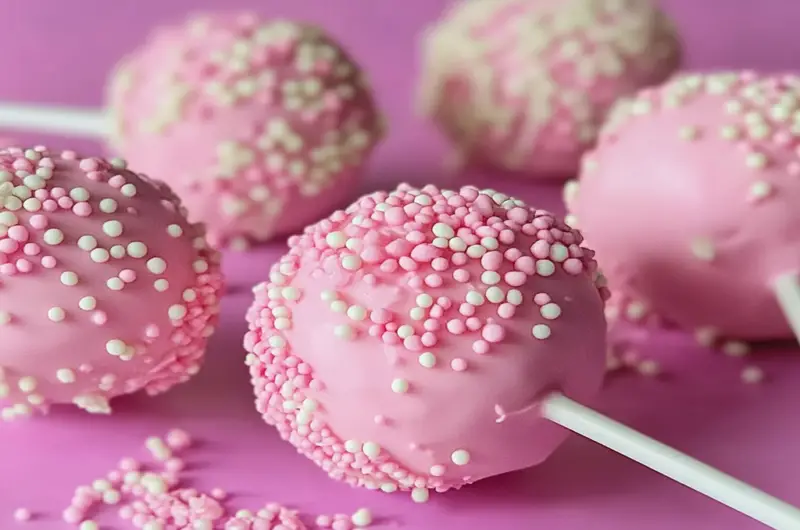
Imagine sinking your teeth into a delightful pink cake pop that’s not just a feast for the eyes but also a celebration of flavors. The moment you take a bite, it’s like a sweet explosion of fluffy cake and rich frosting, all wrapped up in a candy-coated shell. irresistible macaron cake These DIY pink cake pops are perfect for birthdays, tea parties, or even when you just want to treat yourself after a long week of adulting.
I still remember the first time I attempted to make cake pops—what a disaster! My kitchen looked like a frosting bomb had exploded, and let’s not even talk about the pink dye incident. But with each failed attempt came experience, and now I can whip up these adorable treats with my eyes closed (well, maybe not literally). So, if you’re ready to dive into the world of cake pops and sprinkle some joy into your life, let’s get started!
Why You'll Love This Recipe
- These DIY pink cake pops are incredibly easy to prepare, making them perfect for both novice bakers and seasoned pros.
- With their delightful flavor balance between sweetness and richness, they’re sure to please any palate.
- Visually stunning in their vibrant pink hue, they add a pop of color to any occasion.
- Plus, they’re versatile enough to be customized for any event or personal taste!
Ingredients for DIY Pink Cake Pops
Here’s what you’ll need to make this delicious dish:
- Boxed Cake Mix: Any flavor will do, but vanilla or strawberry works best for that lovely pink color.
- Eggs: You’ll need 3 eggs for that moist texture; go with large eggs for the best results.
- Oil: A half cup of vegetable oil keeps the cake pops from drying out.
- Frosting: Use store-bought or homemade; creamy buttercream is my go-to.
- Pink Candy Melts: These will be your outer layer, giving the pops that gorgeous pink finish.
- Lollipop Sticks: Essential for turning your creations into handheld delights.
How to Make DIY Pink Cake Pops
Follow these simple steps to prepare this delicious dish:
Step 1: Bake the Cake
Preheat your oven according to the instructions on the boxed cake mix (usually around 350°F or 175°C). Prepare your baking pan by greasing it lightly. Pour in that lovely batter and bake until golden brown—around 25-30 minutes should do it.
Step 2: Crumble the Cake
Once baked and cooled completely (patience is key here), remove the cake from the pan. Crumble it into fine pieces in a large bowl—you want it fluffy and airy.
Step 3: Mix in Frosting
Grab about half a cup of frosting and mix it into your crumbled cake. Get ready for some serious elbow grease because this part can get messy! You want it moist enough to form balls but not too mushy.
Step 4: Shape Your Pops
Now comes the fun part! Roll small portions of this mixture into balls—think golf ball size—and place them on a parchment-lined tray. Chill them in the fridge for at least an hour so they set nicely.
Step 5: Dip Into Candy Melts
Melt your pink candy melts according to package instructions until smooth (microwave works great). Dip one end of each lollipop stick into the melts before inserting them into your chilled cake balls—this helps keep them from falling off later.
Step 6: Final Dipping
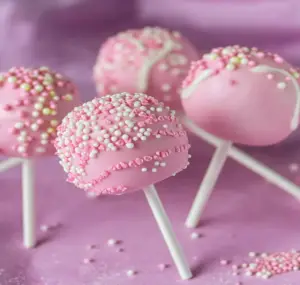
Now fully dip each chilled cake pop into the melted candy melts until coated evenly. Tap off any excess chocolate before placing them upright in styrofoam or an empty egg carton until set.
Transfer these cute little delights onto plates or serve them at parties—they’re sure to brighten anyone’s day! Enjoy your creations with friends or eat them all yourself (no judgment here)!
You Must Know
- DIY Pink Cake Pops are not just a treat; they are a vibrant burst of fun at any party.
- Customizable and easy to make, these cake pops are perfect for kids’ birthdays or even a cheeky adult gathering.
- Their delightful appearance and taste will leave everyone wanting more!
Perfecting the Cooking Process
First, bake your favorite cake and let it cool completely. Crumble the cake into fine pieces, then mix in frosting until you achieve a dough-like consistency. Form into balls, chill them, dip in chocolate, and voilà!
Add Your Touch
Feel free to swap out traditional vanilla cake for something adventurous like red velvet or chocolate. You can also experiment with flavored frostings or add sprinkles for extra pizzazz—because who doesn’t love a little sparkle?
Storing & Reheating
Store your DIY Pink Cake Pops in an airtight container in the fridge for up to one week. If you want to enjoy them later, freeze them wrapped individually and thaw before serving.
Chef's Helpful Tips
- Use a cookie scoop for uniform cake pop sizes to ensure even baking and dipping.
- Always let the melted chocolate cool slightly before dipping to prevent cracking.
- Chill your cake balls thoroughly; this makes dipping easier and helps keep their shape.
My first attempt at making DIY Pink Cake Pops was filled with laughter when my friends decided to have a “pop-off” competition. Let’s just say, we had more frosting on ourselves than on the pops!
FAQs:
What are DIY Pink Cake Pops made of?
DIY Pink Cake Pops consist of cake crumbs mixed with frosting, shaped into balls, and coated in pink candy melts. You can use any cake flavor you like, such as vanilla, chocolate, or red velvet. The key is to ensure that the frosting binds the cake crumbs together well. chocolate dipped strawberries Once shaped, dip them in melted pink chocolate and decorate them with sprinkles for a fun finish. beach themed cupcakes graduation themed sugar cookies These treats are perfect for parties or special occasions.
How do I make my DIY Pink Cake Pops look professional?
To achieve a professional look with your DIY Pink Cake Pops, ensure your cake balls are uniform in size. Use a cookie scoop for even portions. Allow the candy coating to cool slightly before dipping to avoid drips. After dipping, place them upright in a styrofoam block or a cake pop holder until the coating hardens. Finally, add decorative touches like edible glitter or sprinkles to enhance their appearance.
Can I store DIY Pink Cake Pops?
Yes, you can store DIY Pink Cake Pops! Keep them in an airtight container at room temperature for up to 1 week. If you need to store them longer, place them in the refrigerator, where they can last for about 2 weeks. Make sure they are not exposed to moisture to maintain their texture and flavor. When ready to serve, allow them to come back to room temperature for the best taste.
Can I customize my DIY Pink Cake Pops?
Absolutely! Customizing your DIY Pink Cake Pops is part of the fun. You can change the color of the candy melts based on themes or occasions by using different food coloring. Experiment with various flavors of frosting and cake mixes for unique tastes. Additionally, feel free to add toppings like crushed nuts or coconut flakes for added texture and flavor variations.
Conclusion for DIY Pink Cake Pops:
In summary, DIY Pink Cake Pops are a delightful treat that combines sweetness and creativity. With simple ingredients like cake crumbs, frosting, and colorful candy melts, you can create visually appealing desserts suitable for any celebration. By following the tips mentioned above on presentation and storage, you can ensure your cake pops remain fresh and tasty. Enjoy making these charming treats while exploring endless customization options!
DIY Pink Cake Pops

Indulge in the delightful world of DIY Pink Cake Pops, where fluffy cake meets creamy frosting, all enveloped in a vibrant pink candy coating. Perfect for birthdays, celebrations, or simply a treat for yourself, these eye-catching sweets are as fun to make as they are to eat.
- Prep Time: 30 minutes
- Cook Time: 30 minutes
- Total Time: 1 hour
- Yield: Approximately 12 servings 1x
- Category: Dessert
- Method: Baking
- Cuisine: American
Ingredients
- 1 box (15.25 oz) vanilla or strawberry cake mix
- 3 large eggs
- ½ cup vegetable oil
- ½ cup buttercream frosting (store-bought or homemade)
- 12 oz pink candy melts
- 12 lollipop sticks
Instructions
- Preheat your oven to 350°F (175°C) and grease a baking pan. Prepare the cake mix according to package instructions and bake for 25-30 minutes.
- Once cooled, crumble the cake into fine pieces in a large bowl.
- Mix in the frosting until the mixture reaches a dough-like consistency.
- Roll into golf ball-sized balls and chill in the fridge for at least an hour.
- Melt pink candy melts according to package instructions. Dip one end of each lollipop stick into the melts before inserting them into the chilled cake balls.
- Fully dip each cake pop into the melted candy melts, tapping off excess coating. Place upright in styrofoam or an egg carton until set.
Nutrition
- Serving Size: 1 serving
- Calories: 160
- Sugar: 10g
- Sodium: 100mg
- Fat: 7g
- Saturated Fat: 2g
- Unsaturated Fat: 4g
- Trans Fat: 0g
- Carbohydrates: 22g
- Fiber: 0g
- Protein: 2g
- Cholesterol: 20mg