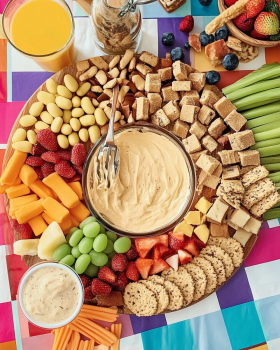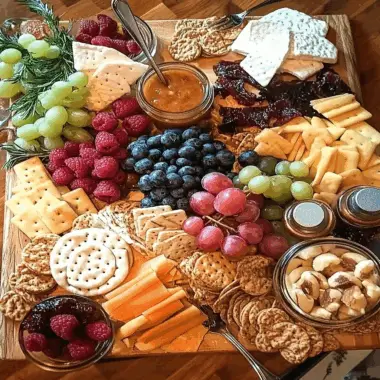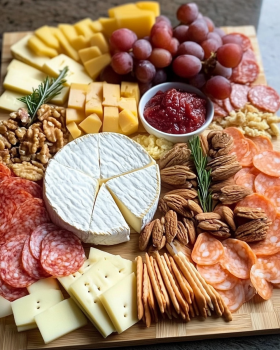
You know that feeling when summer rolls around, and all you want to do is lounge in the sun with good food and even better company? Imagine a vibrant spread of colors and textures right in front of you—the Summer Cheese Board is your ultimate ticket to summer bliss! With creamy cheeses, crisp fruits, and a sprinkle of nuts, it’s like a party on a platter that’s just begging for you to dive in.
Picture this: You’re hosting a backyard BBQ, the sun shines bright, and laughter fills the air. You place your gorgeous Summer Cheese Board on the table. Everyone gathers around, eyes wide with delight as they savor the rich flavors and delightful pairings. delicious dessert pairing Whether it’s a casual get-together or an upscale soirée, this board is sure to impress!
Why You'll Love This Recipe
- This Summer Cheese Board offers effortless elegance; it’s simple enough for any beginner but impressive enough to wow your guests.
- The flavor combinations are endless—mix and match to suit your taste buds!
- It’s visually stunning with its array of colors, making it the centerpiece of any gathering.
- Perfect for summer picnics or cozy evenings at home while sipping on wine.
Ingredients for Summer Cheese Board
Here’s what you’ll need to make this delicious dish:
- Assorted Cheeses: Choose a variety of textures such as creamy brie, sharp cheddar, and tangy goat cheese for an exciting flavor experience.
- Fresh Fruits: Grapes, figs, or berries add sweetness and juiciness; opt for seasonal picks for maximum freshness.
- Nuts: Almonds or walnuts provide crunch; lightly roast them for added flavor.
- Crackers: Select an assortment of textures—from buttery to whole grain—for perfect cheese pairings.
- Honey or Jam: A drizzle of honey adds sweetness; consider fig jam for a gourmet touch!
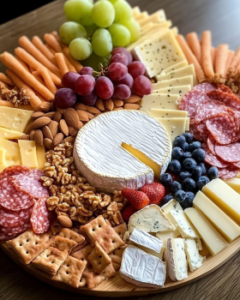
How to Make Summer Cheese Board
Follow these simple steps to prepare this delicious dish:
Step 1: Gather Your Ingredients
Begin by collecting all your selected cheeses, fruits, nuts, crackers, and spreads. Arrange them on a large wooden board or platter that showcases their beauty!
Step 2: Cheese Placement
Start by placing your assorted cheeses on the board. Cut some into slices while leaving others whole for visual diversity.
Step 3: Add Fresh Fruits
Next up, fill in the gaps with fresh fruits. Scatter grapes and figs around the cheeses—this visually appealing arrangement will have everyone reaching for more.
Step 4: Nuts Galore
Sprinkle your choice of nuts around the board. This adds not only flavor but also texture that complements the creaminess of the cheeses.
Step 5: Crackers Galore
Now it’s time to add those tasty crackers! Arrange them in small stacks or fan them out on one side—either way works beautifully!
Step 6: Sweet Finish
Finally, add a small bowl of honey or jam in one corner. This sweet touch brings everything together and provides contrast against the savory items.
Transfer to plates as needed and watch as your friends marvel at your culinary prowess! Enjoy every bite of this Summer Cheese Board while basking in good company and sunshine!
You Must Know
- This summer cheese board is more than just a snack; it’s an experience.
- With colorful cheeses, crunchy crackers, and fresh fruits, it dazzles the eyes.
- Perfect for gatherings, it brings friends together while catering to every palate.
Perfecting the Cooking Process
Start by selecting your cheeses and arranging them on the board. Next, add nuts and fruits for contrast. Finally, place crackers or bread around the edges. This sequence ensures everything looks appealing and is easy to grab.
Add Your Touch
Feel free to customize your summer cheese board with different types of cheeses or seasonal fruits. Add olives or charcuterie for a savory touch or drizzle honey for sweetness. Let your creativity shine!
Storing & Reheating
To maintain freshness, cover any leftover cheese board items tightly with plastic wrap or store in airtight containers in the fridge for up to three days. Enjoy cold without reheating for best flavor.
Chef's Helpful Tips
- Use a variety of textures and flavors by mixing soft and hard cheeses on your summer cheese board.
- Don’t forget to let your cheeses sit out for an hour so they can reach room temperature before serving.
- Keep a cheese knife handy for easy slicing!
Sometimes my friends joke that my summer cheese boards could be an Olympic sport—they’re that competitive! I once made one for a picnic, and it disappeared faster than you can say “cheddar.”
FAQs :
What is a Summer Cheese Board?
A Summer Cheese Board is a delightful arrangement of various cheeses, fruits, nuts, and accompaniments designed for warm-weather gatherings. It typically includes soft cheeses like Brie or goat cheese, alongside hard cheeses such as aged cheddar. refreshing summer dessert Seasonal fruits like berries and melons add a refreshing touch, while nuts provide crunch. This board can be customized to your taste and is perfect for picnics, barbecues, or casual get-togethers.
How do I choose the right cheeses for my Summer Cheese Board?
Selecting the right cheeses is crucial for an impressive Summer Cheese Board. Aim for a variety of textures and flavors. Include a soft cheese, a semi-soft cheese, and a hard cheese to create balance. Popular choices include creamy Brie, tangy goat cheese, and sharp cheddar. Consider adding regional specialties or artisanal options to elevate your board. Pairing cheeses with complementary fruits and nuts enhances the overall experience.
What fruits should I include on my Summer Cheese Board?
Seasonal fruits are essential for a vibrant Summer Cheese Board. Fresh berries like strawberries, blueberries, and raspberries add color and sweetness. Sliced melons such as cantaloupe or honeydew provide refreshment. You might also consider figs or stone fruits like peaches for added flavor diversity. Mixing sweet and tart fruits creates an appealing contrast that pairs beautifully with the cheeses.
How do I present my Summer Cheese Board beautifully?
Presentation is key when creating an eye-catching Summer Cheese Board. Start with a large wooden or marble board as your base. Arrange the cheeses first, spacing them out evenly. Next, fill in gaps with fruits and nuts, creating visual interest through color and texture contrast. Use small bowls for dips or spreads to enhance the layout. Finally, garnish with fresh herbs like rosemary or thyme to add elegance.
Conclusion for Summer Cheese Board :
Creating a stunning Summer Cheese Board involves selecting a variety of cheeses, seasonal fruits, and crunchy nuts to delight your guests. Pay attention to presentation by arranging items artfully on your serving board to make it visually appealing. Don’t hesitate to mix flavors and textures; this enhances the overall tasting experience. With these tips in mind, you can create an unforgettable Summer Cheese Board that will impress at any gathering!
Summer Cheese Board
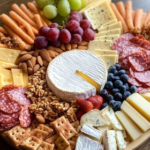
Indulge in the ultimate summer experience with this vibrant Summer Cheese Board. Perfect for outdoor gatherings or cozy evenings, this colorful spread features a delightful mix of creamy cheeses, fresh fruits, crunchy nuts, and flavorful crackers. With endless combinations to suit every palate, your guests will be captivated by the stunning presentation and delicious flavors. Elevate your summer entertaining with this easy-to-create centerpiece that invites everyone to dig in!
- Prep Time: 15 minutes
- Cook Time: N/A
- Total Time: 0 hours
- Yield: Serves 8
- Category: Appetizer
- Method: No cooking required
- Cuisine: Continental
Ingredients
- 8 oz assorted cheeses (e.g., Brie, cheddar, goat cheese)
- 1 cup fresh fruits (grapes, figs, berries)
- ½ cup nuts (almonds or walnuts)
- 1 cup assorted crackers
- ¼ cup honey or jam
Instructions
- Gather all ingredients: cheeses, fruits, nuts, crackers, and honey/jam.
- Arrange the assorted cheeses on a large wooden board; cut some into slices and leave others whole for visual interest.
- Fill gaps with fresh fruits like grapes and figs for added color.
- Sprinkle nuts around the board for texture contrast.
- Add an assortment of crackers along the edges of the board.
- Finish with a small bowl of honey or jam in one corner.
Nutrition
- Serving Size: 1/8 board (approximately 120g)
- Calories: 300
- Sugar: 15g
- Sodium: 400mg
- Fat: 20g
- Saturated Fat: 10g
- Unsaturated Fat: 9g
- Trans Fat: 0g
- Carbohydrates: 25g
- Fiber: 3g
- Protein: 8g
- Cholesterol: 30mg