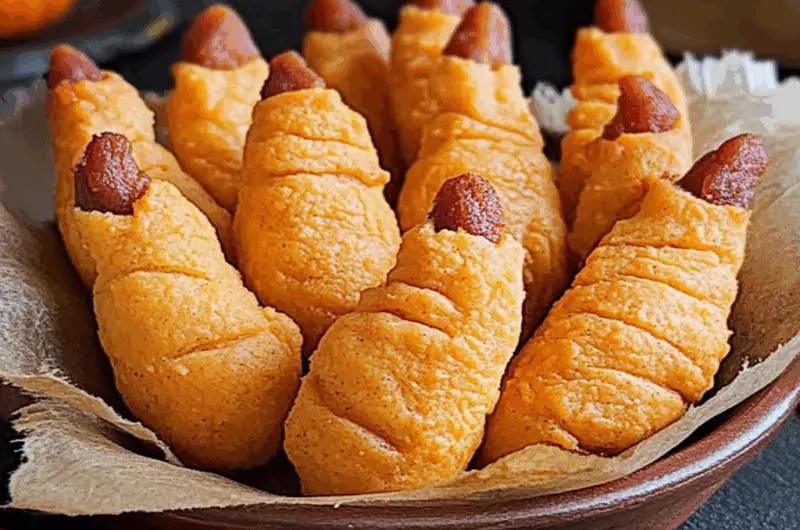
Witch Fingers are not your average snack; they’re the perfect combination of creepy and delicious, guaranteed to bring a playful chill to your Halloween festivities. Picture this: you take a bite and are greeted with a satisfying crunch, followed by the comforting warmth of sweet almond flavors. unique Halloween treats As you savor each morsel, the eerie green hue adds an unforgettable visual twist that’ll leave your guests both intrigued and delighted.
Every year, I whip up these Witch Fingers for our annual fright-night movie marathon, where we devour popcorn by the bucket and scare ourselves silly with classic horror flicks. It’s become a tradition that not only fills our bellies but also sparks laughter and joy among friends. And trust me, there’s nothing quite like watching someone take a big bite of these ghoulish treats while trying to keep a straight face—pure comedy gold!
Why You'll Love This Recipe
- The preparation is so simple that even my cat could do it—if he had thumbs.
- The flavor profile is a delightful mix of sweet and nutty, making them irresistible.
- Their vibrant green color makes them a showstopper at any gathering.
- Perfect for Halloween parties or spooky-themed dinners, they are versatile enough for any occasion!
Ingredients for Witch Fingers
Here’s what you’ll need to make this delicious dish:
- All-purpose flour: This forms the base of your dough, so use freshly opened flour for optimal texture.
- Powdered sugar: For sweetness and easy mixing, ensure it’s well-sifted to avoid clumps.
- Butter: I recommend unsalted butter for better control over the overall flavor.
- Almond extract: This will give that nutty flavor reminiscent of traditional cookies.
- Pistachios: Chopped pistachios serve as the “fingernails” for an extra creepy touch.
- Green food coloring: Essential for that spooky witchy vibe; adjust to your desired shade.
How to Make Witch Fingers
Follow these simple steps to prepare this delicious dish:
Step 1: Preheat Your Oven
Preheat your oven to 350°F (175°C). Grab a baking sheet and line it with parchment paper; this will prevent our witchy fingers from sticking.
Step 2: Mix the Dough
In a mixing bowl, cream together softened butter and powdered sugar until fluffy. Add in almond extract and several drops of green food coloring until you achieve your desired hue.
Step 3: Combine Dry Ingredients
In another bowl, whisk together all-purpose flour until it’s light and airy. Gradually add this mixture into your wet ingredients until combined into a soft dough.
Step 4: Shape the Fingers
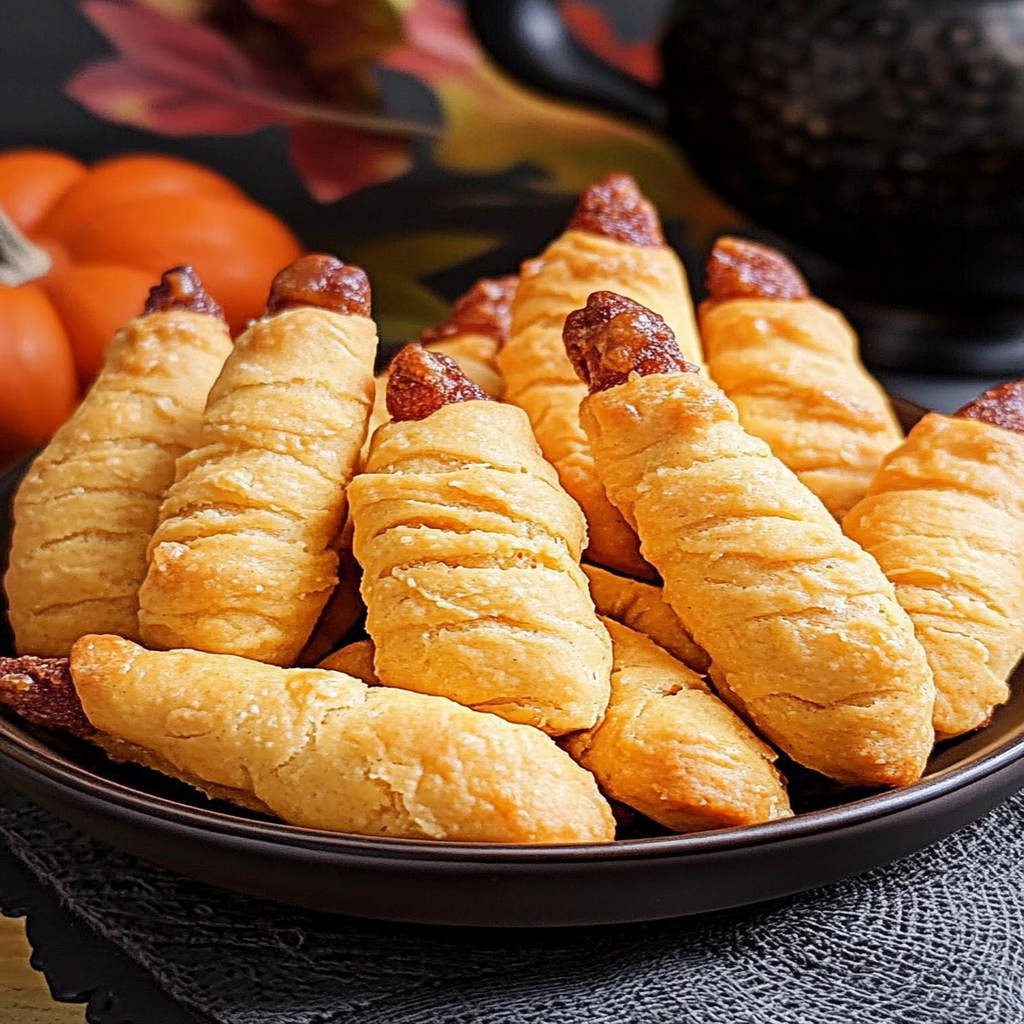
Take small portions of dough and roll them into finger shapes about four inches long. Pinch one end to create a tapered point resembling a finger tip. Press chopped pistachios into the tip for nails.
Step 5: Bake
Place shaped fingers on the prepared baking sheet about an inch apart. Bake in your preheated oven for about 15-20 minutes or until they are golden brown around the edges.
Step 6: Cool & Serve
Allow them to cool on wire racks before serving—trust me; you don’t want anyone burning their tongues on these delights. Transfer to a platter and watch as everyone marvels at their eerie beauty!
Witch Fingers are not just fun—they’re downright enchanting! Whether you’re hosting a Halloween bash or just want something amusingly creepy to snack on while binge-watching spooky films, these treats are bound to cast a spell on anyone who dares take a bite!
You Must Know
- Witch Fingers are not only spooky but also ridiculously fun to make.
- These creepy snacks can steal the show at any Halloween party.
- With a delightful crunch and a touch of humor, they’re perfect for kids and adults alike!
Perfecting the Cooking Process
To achieve perfect Witch Fingers, start by mixing your dough and chilling it. Shape the fingers while waiting for the oven to preheat, then bake until golden. This sequence ensures even baking and that your fingers won’t turn into ghoulish blobs.
Add Your Touch
Feel free to get creative with flavors! Swap out almond slivers for pumpkin seeds for a nut-free version or add green food coloring to the dough for extra spookiness. The possibilities are as endless as your imagination!
Storing & Reheating
Store leftover Witch Fingers in an airtight container at room temperature for up to three days. If you want to reheat them, pop them back in the oven at 350°F for about five minutes to regain their crunch.
Chef's Helpful Tips
- For perfectly shaped Witch Fingers, chill your dough before shaping—this makes handling easier and keeps them from spreading too much.
- Don’t skip the almond nails; they add character and crunch.
- Finally, always keep an eye on baking time—the last thing you want is burnt ghouls!
It was last Halloween when my kids convinced me that we needed to whip up a batch of Witch Fingers for their school party. Watching their faces light up as they presented their creepy creations was priceless!
FAQs :
What are Witch Fingers made of?
Witch Fingers are a fun and spooky treat typically made from almond flour, butter, sugar, and eggs. The dough is shaped into long, finger-like forms to resemble creepy fingers. A slice of almond is often used as a “nail” at the tip, giving them an eerie look. You can also use food coloring to enhance their appearance. These treats are perfect for Halloween parties or themed gatherings, combining delicious flavors with a frightful aesthetic.
How do I store Witch Fingers?
To keep your Witch Fingers fresh, store them in an airtight container at room temperature for up to four days. If you want them to last longer, you can freeze them for up to three months. When you’re ready to enjoy them again, simply thaw at room temperature or warm them briefly in the oven. Proper storage ensures that these spooky treats remain tasty and visually appealing for your next celebration.
Can I make Witch Fingers gluten-free?
Yes, you can make Witch Fingers gluten-free by substituting almond flour or gluten-free all-purpose flour for regular flour. Many recipes already use almond flour as a base due to its nutty flavor and texture. festive cookie recipes Ensure that all other ingredients, such as baking powder and sugar, are also gluten-free. This adaptation allows everyone to enjoy these delightful treats without worrying about gluten sensitivities.
Can I customize the flavor of Witch Fingers?
Absolutely! While traditional Witch Fingers have a buttery flavor, you can customize them by adding different extracts like vanilla or almond for extra depth. You could also mix in chocolate chips or spices like cinnamon to create unique variations. Experimenting with flavors not only keeps things interesting but also allows you to personalize these spooky treats according to your preferences.
Conclusion for Witch Fingers :
Witch Fingers are an imaginative and delicious treat perfect for Halloween festivities or any spooky occasion. Made from simple ingredients like almond flour and butter, they offer a delightful blend of taste and creativity. By following the recipe closely and considering storage options, you can ensure these eerie delights stay fresh and enjoyable. spooky dessert ideas Customization options allow for endless variations, making Witch Fingers a versatile addition to your dessert repertoire. Embrace the fun of baking these creepy yet tasty treats
Witch Fingers

Witch Fingers are a delightfully spooky treat perfect for Halloween parties or themed gatherings. These almond-flavored cookies are shaped like creepy fingers and adorned with pistachio ‘nails,’ making them both fun to make and deliciously addictive. With their vibrant green hue and satisfying crunch, they’ll be the star of your fright-night festivities. Whip up a batch and watch as your friends are both intrigued and entertained by these charmingly eerie snacks!
- Prep Time: 15 minutes
- Cook Time: 20 minutes
- Total Time: 35 minutes
- Yield: Approximately 24 servings 1x
- Category: Dessert
- Method: Baking
- Cuisine: American
Ingredients
- 2 cups all-purpose flour
- 1 cup powdered sugar
- 1 cup unsalted butter, softened
- 2 tsp almond extract
- 1/2 cup chopped pistachios
- Green food coloring (to desired shade)
Instructions
- Preheat the oven to 350°F (175°C) and line a baking sheet with parchment paper.
- In a bowl, cream together the softened butter and powdered sugar until fluffy. Stir in the almond extract and several drops of green food coloring until well combined.
- In another bowl, whisk together the all-purpose flour until light, then gradually mix it into the wet ingredients to form a soft dough.
- Shape small portions of dough into finger-like forms about four inches long, tapering one end to resemble a fingertip. Press chopped pistachios into the tips for nails.
- Place the shaped fingers on the prepared baking sheet, leaving space between them. Bake for 15-20 minutes or until golden brown around the edges.
- Allow to cool on wire racks before serving.
Nutrition
- Serving Size: 1 serving
- Calories: 150
- Sugar: 5g
- Sodium: 50mg
- Fat: 9g
- Saturated Fat: 5g
- Unsaturated Fat: 4g
- Trans Fat: 0g
- Carbohydrates: 16g
- Fiber: 0g
- Protein: 2g
- Cholesterol: 25mg