
Imagine biting into a warm, golden pastry that gives way to a burst of sweet, juicy fruit filling, the aroma wafting through the air like a cozy hug from your grandmother. Quick Fruit Piroshki (Extra Easy) are not just pastries; they’re a delightful journey through flavor and nostalgia, perfect for those lazy Sunday afternoons when you crave something both comforting and delicious.
I still remember the first time I helped my mom make these delightful treats, flour flying everywhere as we laughed our way through the kitchen chaos. Whether you’re whipping them up for an impromptu gathering or simply indulging in a sweet moment of solitude, these piroshki promise to elevate any occasion with their irresistible taste and ease of preparation. Get ready to experience a flavor explosion wrapped in flaky goodness!
Why Is Quick Fruit Piroshki (Extra Easy) So Irresistibly Good?
Quick and easy to whip up, these piroshki require just 15 minutes of prep time! Deliciously versatile, you can fill them with your choice of jam or fresh fruit for endless flavor combinations. Perfectly golden-brown, they offer a delightful contrast of flaky pastry and sweet filling. Kid-approved, these treats are a hit at any gathering, making them an instant crowd-pleaser!
Quick Fruit Piroshki (Extra Easy) Ingredients
For the Dough
- 2 cups all-purpose flour – This is the base of your dough, giving it structure and texture.
- 1 cup milk – Adds moisture and richness; you can use any milk type you prefer.
- 1 large egg – Binds the ingredients together and helps with browning during baking.
- 2 tablespoons sugar – Sweetens the dough slightly, balancing the fruit filling perfectly.
- 1 tablespoon baking powder – Ensures your piroshki rise beautifully, creating a light and fluffy texture.
- 1/2 teaspoon salt – Enhances the overall flavor of the pastry, making it more delicious.
- 2 tablespoons butter (melted) – Adds richness and flavor; you can substitute with margarine if desired.
For the Filling
- 1 cup fruit filling (such as jam or fresh fruit) – Choose your favorite jam or seasonal fruit for a delightful burst of flavor in every bite of Quick Fruit Piroshki (Extra Easy).
Step-by-Step Quick Fruit Piroshki (Extra Easy)
1. Preheat the oven to 375°F (190°C).
Start by warming up your oven so it’s ready when your delightful piroshki are assembled and ready to bake.
2. Combine flour, sugar, baking powder, and salt in a mixing bowl.
Mix together 2 cups of all-purpose flour, 2 tablespoons of sugar, 1 tablespoon of baking powder, and 1/2 teaspoon of salt until well blended.
3. Add milk, egg, and melted butter to the dry ingredients.
Pour in 1 cup of milk, crack in 1 large egg, and stir in 2 tablespoons of melted butter. Mix everything until just combined for a smooth dough.
4. Roll out the dough and cut into circles.
On a lightly floured surface, roll out your dough to about 1/4 inch thick. Use a round cutter to create circles—each one should be about 3-4 inches in diameter.
5. Place a spoonful of fruit filling in the center of each circle.
Choose your favorite fruit filling—this can be jam or fresh fruit—and add a generous spoonful right in the middle of each circle.
6. Fold the dough over the filling and seal the edges.
Carefully fold each circle in half over the filling, pinching the edges together to create little pockets that will hold all that fruity goodness.
7. Arrange the piroshki on a baking sheet and bake for 20 minutes or until golden brown.
Place your filled piroshki on a baking sheet lined with parchment paper and bake them until they’re beautifully golden—about 20 minutes should do it!
Optional: Brush with melted butter after baking for an extra touch of flavor!
Exact quantities are listed in the recipe card below.
Expert Tips
- Flour Measurement: Use a kitchen scale for accurate flour measurement to ensure your dough isn’t too dry or sticky.
- Dough Consistency: If the dough feels too wet, add a little more flour gradually; if it’s too dry, mix in a splash of milk.
- Sealing Edges: Make sure to seal the edges of your Quick Fruit Piroshki (Extra Easy) well to prevent any filling from leaking during baking.
- Filling Choice: Choose thicker jams or fresh fruit that won’t release too much juice, which could make the dough soggy.
- Baking Time Check: Keep an eye on the piroshki during the last few minutes of baking; oven temperatures can vary and you want them golden brown.
How to Store and Freeze Quick Fruit Piroshki (Extra Easy)
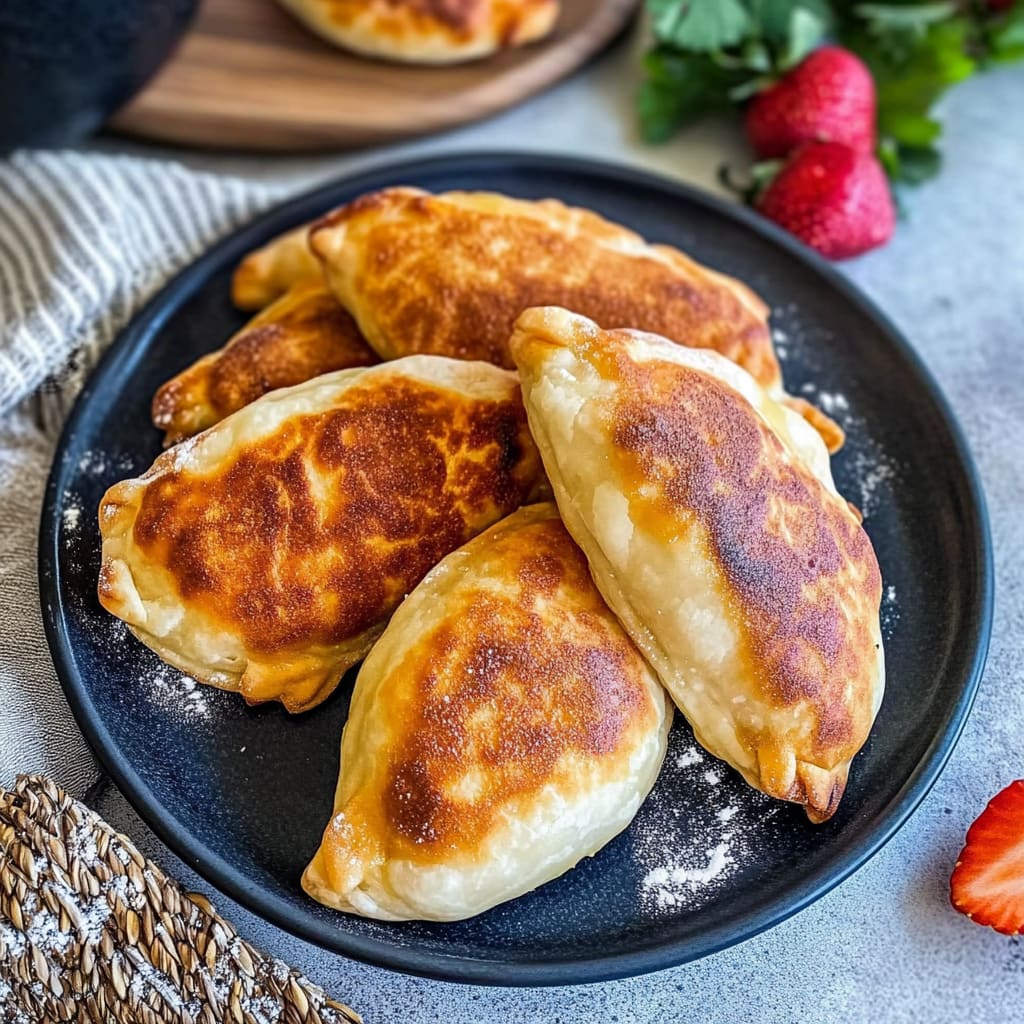
- Room Temperature: Enjoy your Quick Fruit Piroshki (Extra Easy) fresh for up to 2 days stored in an airtight container at room temperature.
- Fridge: For longer freshness, keep them in the fridge for up to 5 days. Ensure they are wrapped tightly to prevent drying out.
- Freezer: Freeze your piroshki for up to 3 months. Place them in a freezer-safe bag or container, separating layers with parchment paper.
- Reheating: To reheat, simply pop them in the oven at 350°F (175°C) for about 10–15 minutes until warmed through and crispy again.
Quick Fruit Piroshki (Extra Easy) Your Way
Get creative with this delightful pastry by exploring delicious variations that suit your taste and dietary needs!
- Whole Wheat: Substitute half of the all-purpose flour with whole wheat flour for a nuttier flavor and added fiber. This swap enhances the nutritional profile without sacrificing taste, making for a wholesome treat.
- Vegan: Replace milk with almond or oat milk and use a flax egg instead of a regular egg. These changes will still yield a tender pastry while keeping it plant-based and deliciously satisfying.
- Cinnamon Sugar: Add 1 teaspoon of cinnamon to the sugar for a warm, spiced twist. This adds an inviting aroma and flavor that makes every bite feel like a cozy hug.
- Cream Cheese Filling: Mix 1/2 cup of softened cream cheese with your fruit filling for an extra creamy texture. The rich creaminess paired with fruit creates a dreamy filling that elevates your piroshki to gourmet status.
- Savory Spin: Use savory fillings like sautéed mushrooms or spinach and cheese instead of sweet fruit. This twist transforms the piroshki into an amazing appetizer or snack, perfect for any gathering.
- Zesty Lemon: Add lemon zest to the dough or filling for a bright, refreshing flavor. A hint of citrus awakens the palate and adds an unexpected burst of brightness to each bite.
- Nutty Crunch: Fold in some chopped nuts, such as walnuts or almonds, into the filling for added texture. This simple addition brings delightful crunchiness, making each piroshki even more satisfying.
- Spicy Kick: Mix in a pinch of cayenne pepper into the dough or filling for an exciting heat level. It’s a fun way to surprise your guests and create a unique flavor experience!
Make Ahead Options
Preparing Quick Fruit Piroshki (Extra Easy) is a fantastic way to streamline your meal prep, making delicious pastries ready at a moment’s notice. You can make the dough by combining 2 cups of all-purpose flour, 2 tablespoons of sugar, and 1 tablespoon of baking powder with a pinch of salt, then mixing in 1 cup of milk, 1 large egg, and 2 tablespoons of melted butter. This dough can be prepared and refrigerated for up to 3 days; just remember to roll it out and cut into circles when you’re ready to fill. Additionally, your chosen fruit filling—whether it’s a vibrant jam or fresh fruit—can also be prepped in advance and stored for up to a week. When you’re ready to enjoy these delightful treats, simply preheat your oven to 375°F (190°C), fill the circles with your fruit filling, seal them up tight, and bake for about 20 minutes until golden brown. This time-saving method ensures that your family can savor Quick Fruit Piroshki (Extra Easy) whenever the craving strikes!
Quick Fruit Piroshki (Extra Easy) Recipe FAQs
What type of fruit filling works best for Quick Fruit Piroshki?
You can use any fruit filling that tickles your taste buds! Popular options include jam, fresh berries, or even pie filling. If using fresh fruit, make sure to chop it into small pieces and consider adding a bit of sugar for sweetness.
Can I make the dough ahead of time?
Absolutely! You can prepare the dough a day in advance. Wrap it tightly in plastic wrap and store it in the refrigerator. Just remember to let it come to room temperature before rolling it out for the best results.
How should I store leftover piroshki?
If you have any piroshki left over, let them cool completely before storing them in an airtight container. They can be kept at room temperature for up to 2 days or refrigerated for about a week. Just reheat them in the oven at 350°F (175°C) for about 10 minutes to restore their delightful crispness!
Can I freeze Quick Fruit Piroshki?
Yes! These little pastries freeze wonderfully. After baking, allow them to cool completely, then place them in a freezer-safe bag or container. They will keep well for up to 3 months. When you’re ready to enjoy one, simply bake from frozen at 375°F (190°C) for about 25-30 minutes.
What if my dough is too sticky?
If you find your dough is too sticky while working with it, don’t panic! Simply sprinkle a little extra flour on your work surface and your hands while kneading and rolling out. Just be careful not to add too much flour, as this could make your piroshki tough.
How many servings does this recipe yield?
This recipe makes four generous servings, with each serving containing approximately 150 calories. Adjust the quantities accordingly if you’re feeding more mouths—or if you just want seconds!