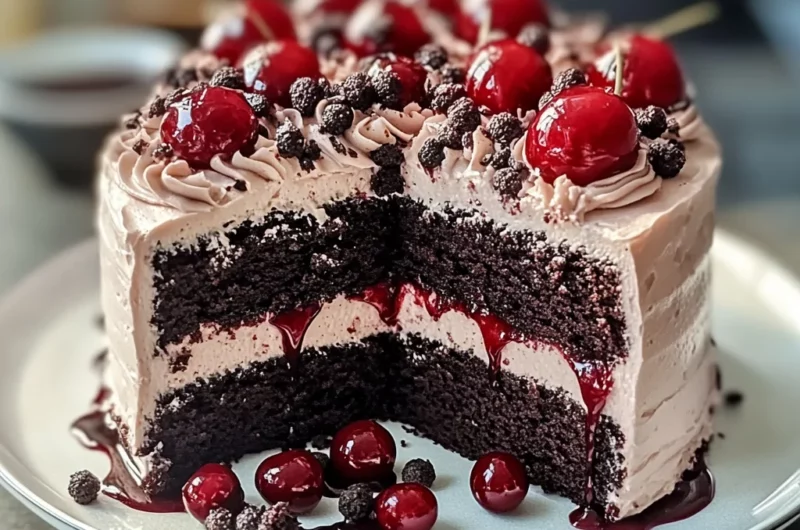
Imagine sinking your fork into a slice of Black Forest Cake, where the luscious chocolate layers embrace tart cherries and fluffy whipped cream, creating a symphony of flavors that dance on your palate. The aroma wafts through the air, teasing your senses as you anticipate each decadent bite, perfect for celebrating life’s sweetest moments or simply indulging on a cozy afternoon.
This cake isn’t just dessert; it’s a delightful trip down memory lane, reminding me of family gatherings filled with laughter and joy. Picture birthdays and holidays where this stunning confection steals the spotlight, leaving everyone in awe and craving more. With every mouthful, you’ll find yourself enchanted by its rich textures and irresistible sweetness, making it an unforgettable treat for any occasion.
What Makes Black Forest Cake So Special?
Indulge in the delightful layers of this rich chocolate cake, perfectly balanced with cherries and whipped cream. Experience a unique taste of Germany’s Black Forest region right in your kitchen. Enjoy the simplicity of preparing this stunning dessert in just 30 minutes! Impress your guests with its luscious flavors and elegant presentation. Savor every bite as the chocolate and cherry combination creates a crowd-pleasing treat that will have everyone coming back for more!
Black Forest Cake Ingredients
For the Cake
- 1 cup all-purpose flour – This forms the base of your cake, giving it structure and texture.
- 1 cup granulated sugar – Sweetens the cake and helps create a moist crumb.
- 1/2 cup cocoa powder – Provides rich chocolate flavor, making this a true Black Forest Cake.
- 1 teaspoon baking powder – Acts as a leavening agent to help the cake rise beautifully.
- 1/2 teaspoon baking soda – Works with the baking powder for an extra lift in your cake.
- 1/2 teaspoon salt – Enhances the flavors and balances the sweetness of the cake.
- 2 large eggs – Binds the ingredients together while adding moisture and richness.
- 1/2 cup milk – Contributes to a tender texture and adds moisture to the batter.
- 1/2 cup vegetable oil – Keeps the cake moist and adds a lovely richness.
- 1 teaspoon vanilla extract – Adds depth and warmth to the overall flavor profile.
For the Filling
- 1 cup cherries (pitted and halved) – Fresh cherries add a burst of flavor and beautiful contrast to the chocolate.
- 1 cup whipped cream – Lightens up the cake layers, providing a delightful creamy texture that complements the chocolate and cherries.
Step-by-Step Black Forest Cake
1. Preheat the oven to 350°F (175°C). Greasing and flouring your cake pan now will ensure an easy release once your cake is baked to perfection.
2. Combine in a mixing bowl the 1 cup all-purpose flour, 1 cup granulated sugar, 1/2 cup cocoa powder, 1 teaspoon baking powder, 1/2 teaspoon baking soda, and 1/2 teaspoon salt. This dry mix creates a delightful foundation for your rich chocolate flavor.
3. Add 2 large eggs, 1/2 cup milk, 1/2 cup vegetable oil, and 1 teaspoon vanilla extract to the dry ingredients. Mix until smooth—this step ensures a rich batter full of love!
4. Pour the batter into the prepared cake pan and bake for about 30 minutes. You’ll know it’s ready when a toothpick inserted in the center comes out clean and the aroma fills your kitchen.
5. Cool completely before removing from the pan. This step is crucial—patience here leads to a beautifully layered Black Forest Cake without crumbling!
For the Assembly:
6. Slice the cooled cake in half horizontally with care; this creates two luscious layers that will hold your filling beautifully.
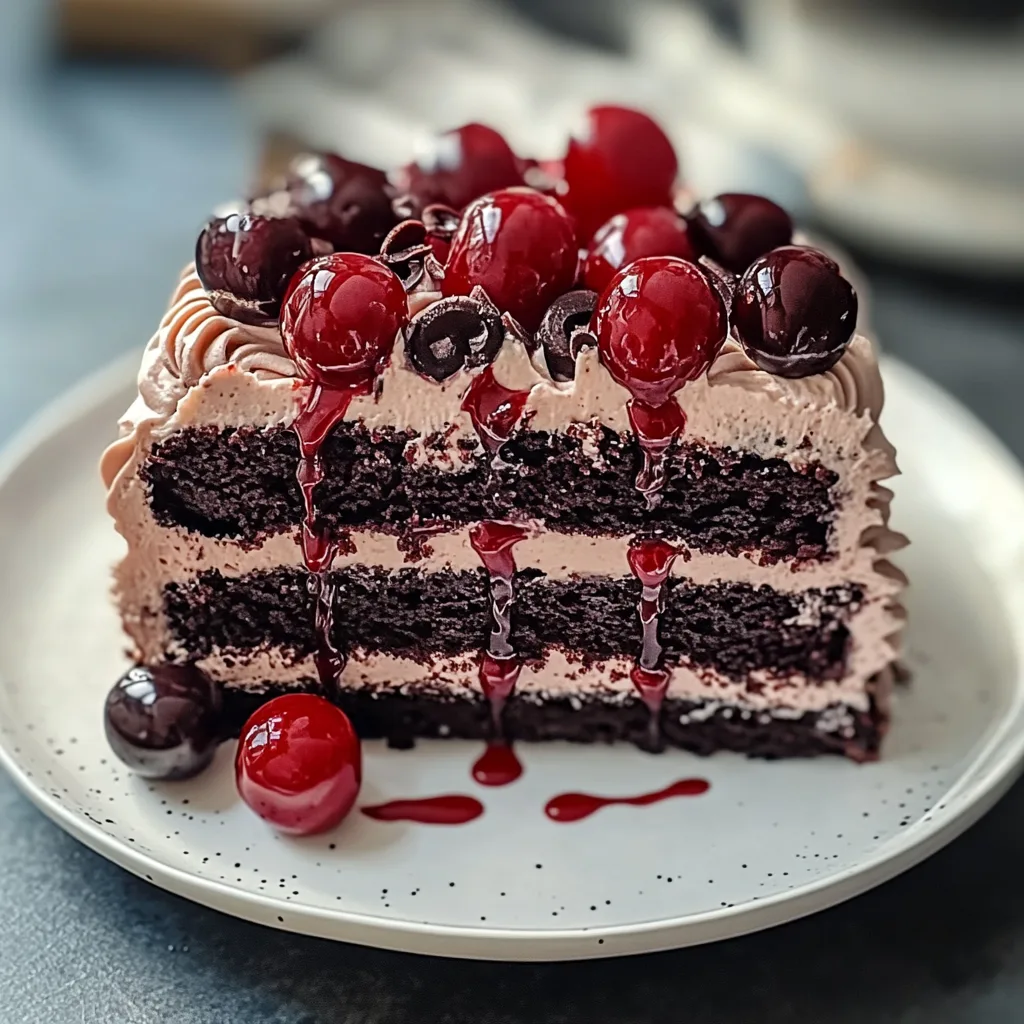
7. Spread a layer of whipped cream and cherries on the bottom half of the cake. The combination brings sweetness and tartness that perfectly complements the chocolatey base.
8. Place the top half of the cake back on gently, then cover with more whipped cream and cherries for that irresistible finishing touch.
Optional: Garnish with chocolate shavings for an extra touch of elegance!
Exact quantities are listed in the recipe card below.
Expert Tips
- Perfect Flour Measurement: Use the spoon-and-level method to measure flour accurately, avoiding a dense Black Forest Cake.
- Cocoa Quality Matters: Opt for high-quality cocoa powder for a richer chocolate flavor that elevates your cake’s taste.
- Room Temperature Ingredients: Ensure eggs and milk are at room temperature for better emulsification, leading to a lighter texture.
- Don’t Overmix: Mix just until combined; overmixing can result in a tough cake. A gentle fold is key to a fluffy Black Forest Cake.
- Cool Completely: Allow your cake to cool completely before assembly. This prevents slipping layers and messy whipped cream.
- Whipped Cream Stability: For best results, use heavy whipping cream and chill your mixing bowl to achieve stable whipped cream that holds its shape.
How to Store and Freeze Black Forest Cake
- Room Temperature: Enjoy your Black Forest Cake at room temperature for up to 2 days, covered with a cake dome or wrapped in plastic wrap to keep it fresh.
- Fridge: Store any leftovers in the refrigerator for up to 5 days, ensuring it’s in an airtight container to prevent the whipped cream from losing its fluffiness.
- Freezer: If you need to freeze your cake, wrap it tightly in plastic wrap and then foil; it can last up to 3 months. Thaw in the fridge before serving.
- Reheating: For a delightful warm slice, gently microwave individual pieces for about 10-15 seconds, but enjoy it chilled for the best flavor experience!
Black Forest Cake Your Way
Feel free to let your creativity shine as you customize this luscious dessert to suit your tastes!
- Gluten-Free: Substitute all-purpose flour with a 1:1 gluten-free flour blend for a deliciously inclusive treat. This swap keeps the cake moist and rich, ensuring no one misses out on the indulgence.
- Rich Chocolate: Boost the cocoa powder to 3/4 cup for an even more decadent flavor. This adds an intense chocolatey depth that will thrill any chocoholic in your life!
- Buttermilk: Replace milk with buttermilk for a tender, flavorful crumb. The slight tang complements the sweetness of the cherries beautifully, enhancing the overall taste of each slice.
- Eggless: Use 1/4 cup unsweetened applesauce or a flaxseed mixture (1 tablespoon ground flaxseed + 2.5 tablespoons water) as an egg replacement. This makes the cake equally moist while catering to those avoiding eggs.
- Cherry Variations: Swap out fresh cherries for raspberries or strawberries if you want a berry twist. Each fruit brings its own unique sweetness and character, creating delightful surprises in every bite.
- Lighter Cream: Opt for Greek yogurt instead of whipped cream for a lighter filling without sacrificing creaminess. It adds a tangy note that pairs wonderfully with the chocolate.
- Spiced Up: Add a pinch of cinnamon or nutmeg to the batter for an aromatic touch. These spices elevate the flavor profile, making each forkful feel like a cozy hug.
- Coffee Infusion: Mix in 1 tablespoon of instant coffee granules into the batter for a mocha twist. The coffee enhances the chocolate flavor and adds a sophisticated layer to this classic cake.
Make Ahead Options
This delightful Black Forest Cake is perfect for meal prep, allowing you to enjoy its rich flavors without the last-minute hustle. You can prepare the cake portion—made with 1 cup of all-purpose flour, 1 cup of granulated sugar, and ½ cup of cocoa powder—up to 24 hours in advance. Simply bake the cake as per the instructions, let it cool completely, and store it wrapped in plastic wrap at room temperature. The whipped cream and cherries can also be prepped ahead; whip your cream and store it in the refrigerator for up to 3 days, while your pitted and halved cherries can be kept fresh for about 2 days in an airtight container. When you’re ready to serve, simply slice the cooled cake in half horizontally, layer on your whipped cream and cherries, place the top half back on, and finish with more whipped cream and cherries. This way, you save time and ensure every bite of your Black Forest Cake is a heavenly experience!
Black Forest Cake Questions Answered
What type of flour is best for Black Forest Cake?
All-purpose flour works beautifully for this Black Forest Cake. It provides the perfect balance of structure and tenderness. If you’re looking for a gluten-free option, you might try a 1: 1 gluten-free flour blend, but keep in mind that texture might vary slightly.
How should I store leftover Black Forest Cake?
To keep your Black Forest Cake fresh, store it in an airtight container in the refrigerator. It will last for about 3-4 days, but trust me, it’s so delicious that it might not last that long! Make sure to cover any exposed portions with plastic wrap to prevent drying out.
Can I freeze Black Forest Cake?
Yes, you can freeze your Black Forest Cake! It’s best to freeze the unassembled cake layers. Wrap them tightly in plastic wrap and then place them in a freezer-safe bag. They can be stored for up to 2 months. When you’re ready to enjoy it, simply thaw it in the refrigerator overnight before assembling.
What if my cake doesn’t rise properly?
If your cake doesn’t rise well, check the freshness of your baking powder and baking soda; they should be within their expiration dates for optimal effectiveness. Additionally, make sure you’re measuring your ingredients accurately—too much flour or too little liquid can lead to a dense cake.
How many servings does this recipe yield?
This delightful Black Forest Cake recipe yields 4 generous servings. If you’re planning for a larger gathering or want leftovers (who wouldn’t?), feel free to double the recipe and bake it in two separate pans for a taller cake!
Can I use different fruits instead of cherries?
Absolutely! While traditional Black Forest Cake is all about those luscious cherries, you could experiment with other fruits like raspberries or strawberries for a delightful twist. Just ensure they’re pitted or hulled as needed and adjust sweetness based on the fruit’s tartness!